
Windows Subsystem for Linux (WSL)
WSL is a tool that enables users to run Bash and core Linux command-line tools on Windows. Ain’t that awesome?!
Introduction
WSL has two different versions namely WSL and WSL 2 where the later one has better overall performance and usability.
In this tutorial we aim to install WSL 2 instead of WSL.
Installation
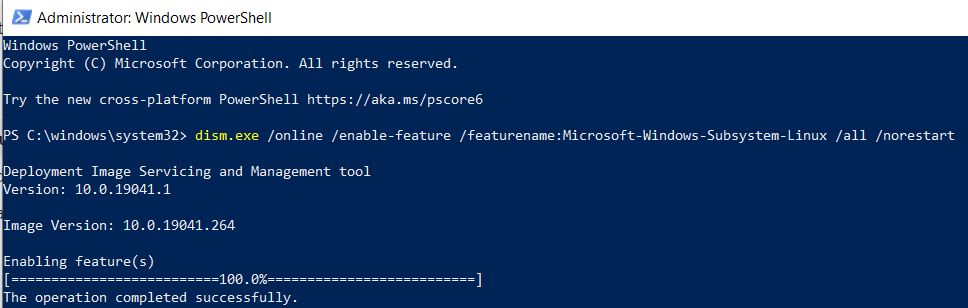
Enable the Windows Subsystem for Linux
dism.exe /online /enable-feature /featurename:Microsoft-Windows-Subsystem-Linux /all /norestart
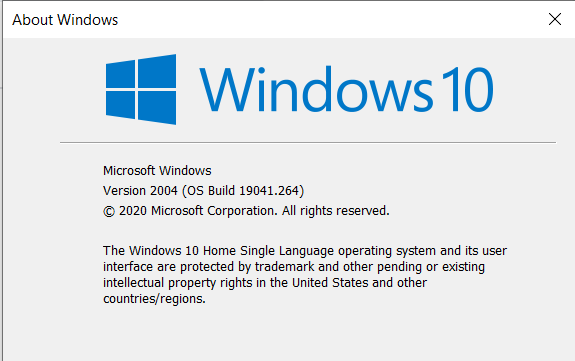
Check system requriements
There are specific system requirements that need to be fulfilled in order to run WSL 2. A detailed description can be found here.
To check your version and build number, select Windows logo key + R, type winver, select OK.
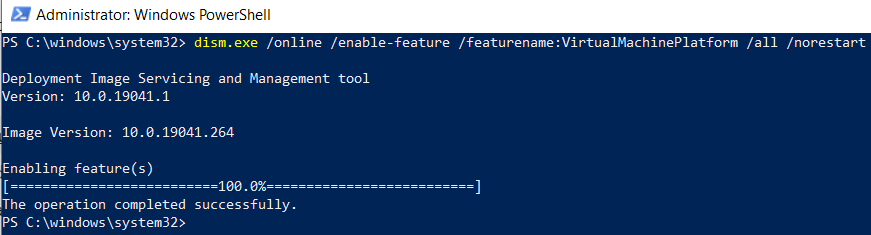
Enable Virtual Machine feature
dism.exe /online /enable-feature /featurename:VirtualMachinePlatform /all /norestart
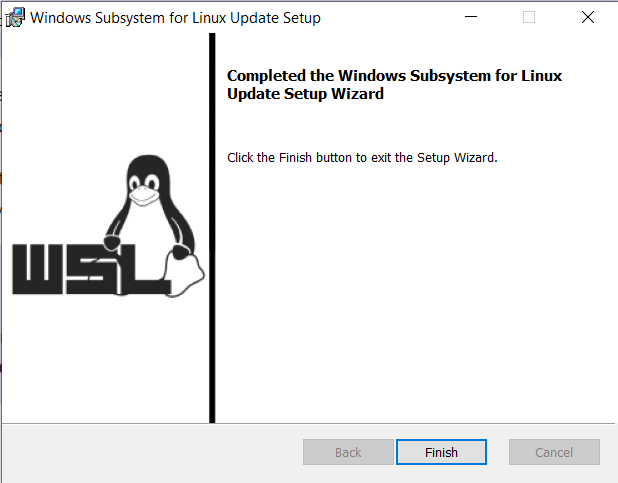
Download and run the Linux kernel update package
Download the latest package from WSL2 Linux kernal update package for x64 machines and run it.
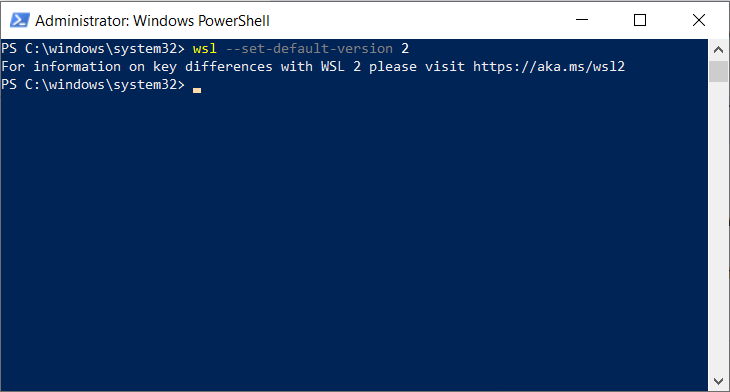
Set WSL 2 as your default version
wsl --set-default-version 2
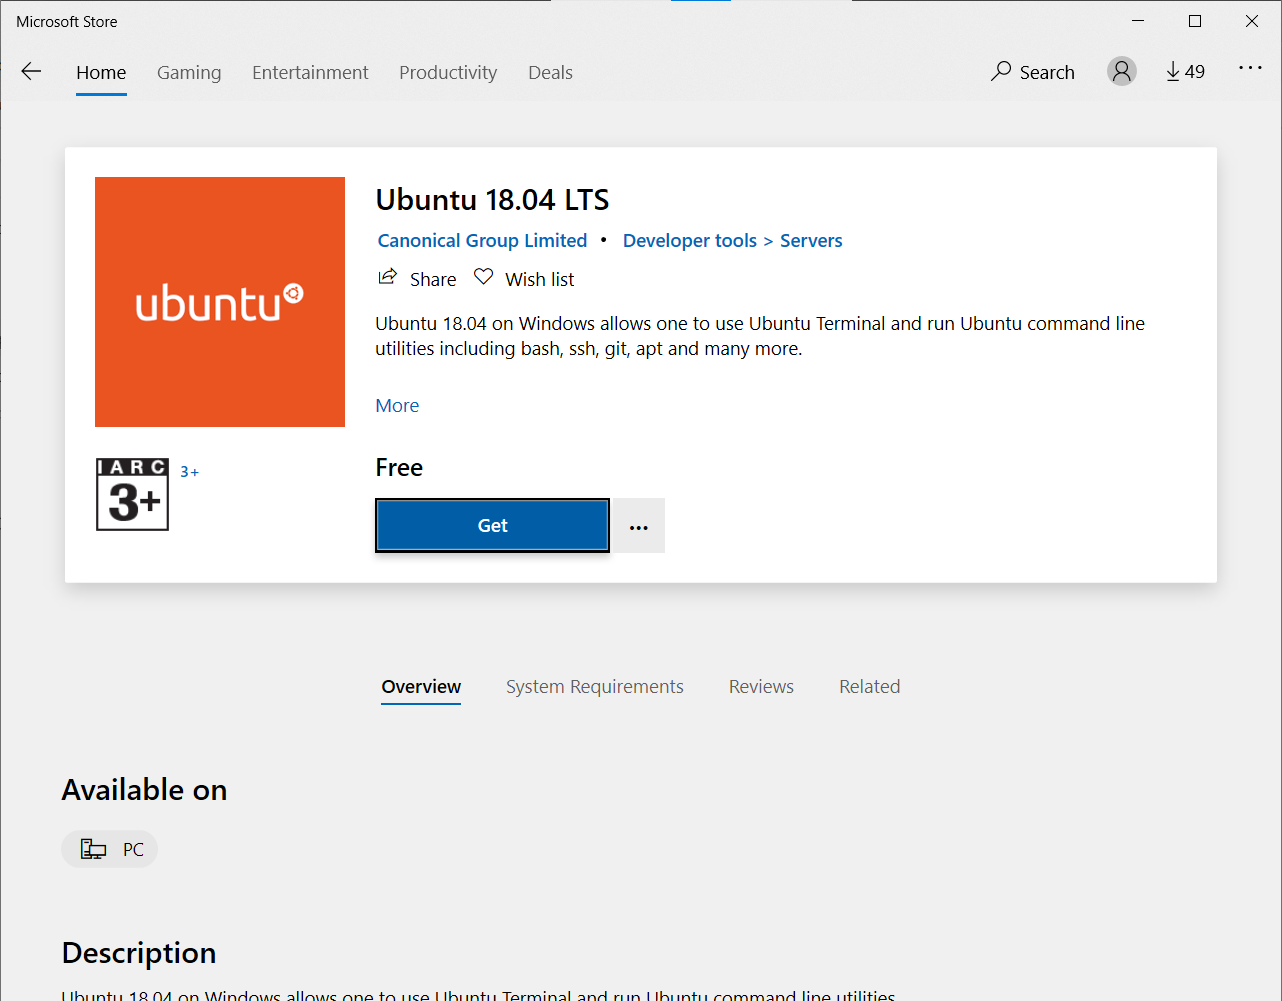
Install Linux distribution
Install your favourite Linux distro from Microsoft Store.
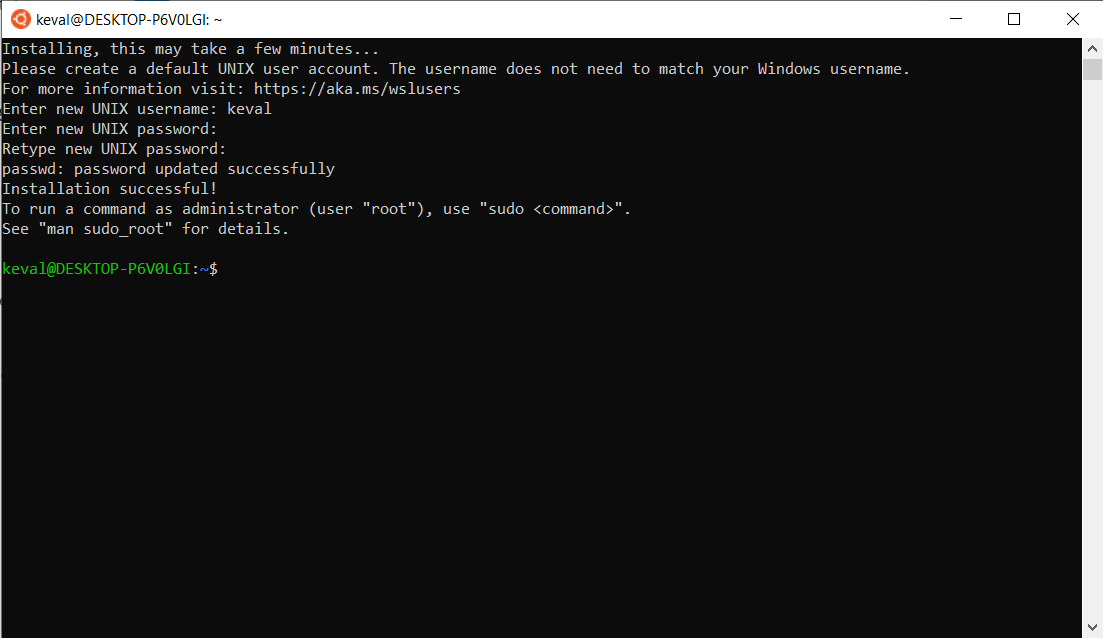
Setting up new distribution
On launching the new Linux distribution, a console window will open and perform some setup operations under the hood for the first time. Subsequent launches should be faster.
Conclusion
Yay!! You’re good to go. Developers can further can setup Visual Studio Code Remote to edit files and develop applications on WSL from Windows.