CT Windowing
Windowing if simply put, is an image processing task for a CT scan that helps highlighting key anatomy so that the images can be analyzed easily.
In other words, Windowing, also known as grey-level mapping, contrast stretching, histogram modification, or contrast enhancement is the process in which the CT scan greyscale component of an image is manipulated via the CT numbers (Hounsfield Units).
Changing windowing settings helps us modify/enhance the appearance of the CT image and highlight particular features in it.
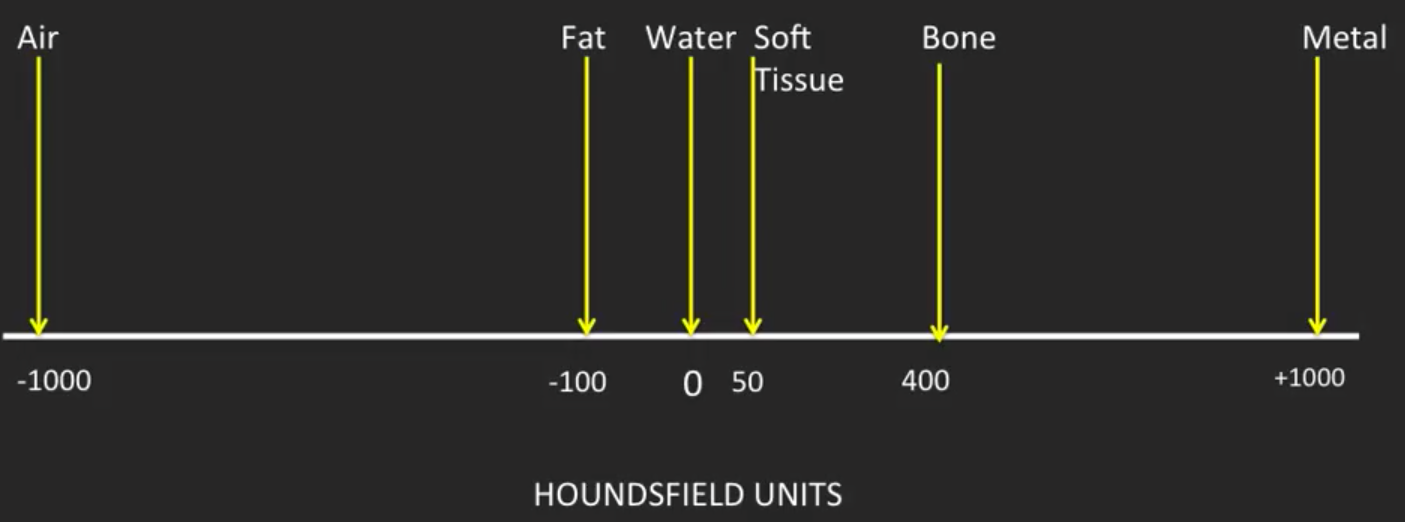
Hounsfield Unit (HU)
Hounsfield Units (HU) are a dimensionless unit universally used in computed tomography (CT) scanning to express CT numbers in a standardized and convenient form.
Well, Hounsfield Units is related to the composition and nature of the tissue and thus, represent the density of various tissues. Note that the higher the HU value the more dense a material is and vice-versa.
Below are a few values on the HU Scale that are important to keep in mind while analyzing CT images.
Window Width and Window Level
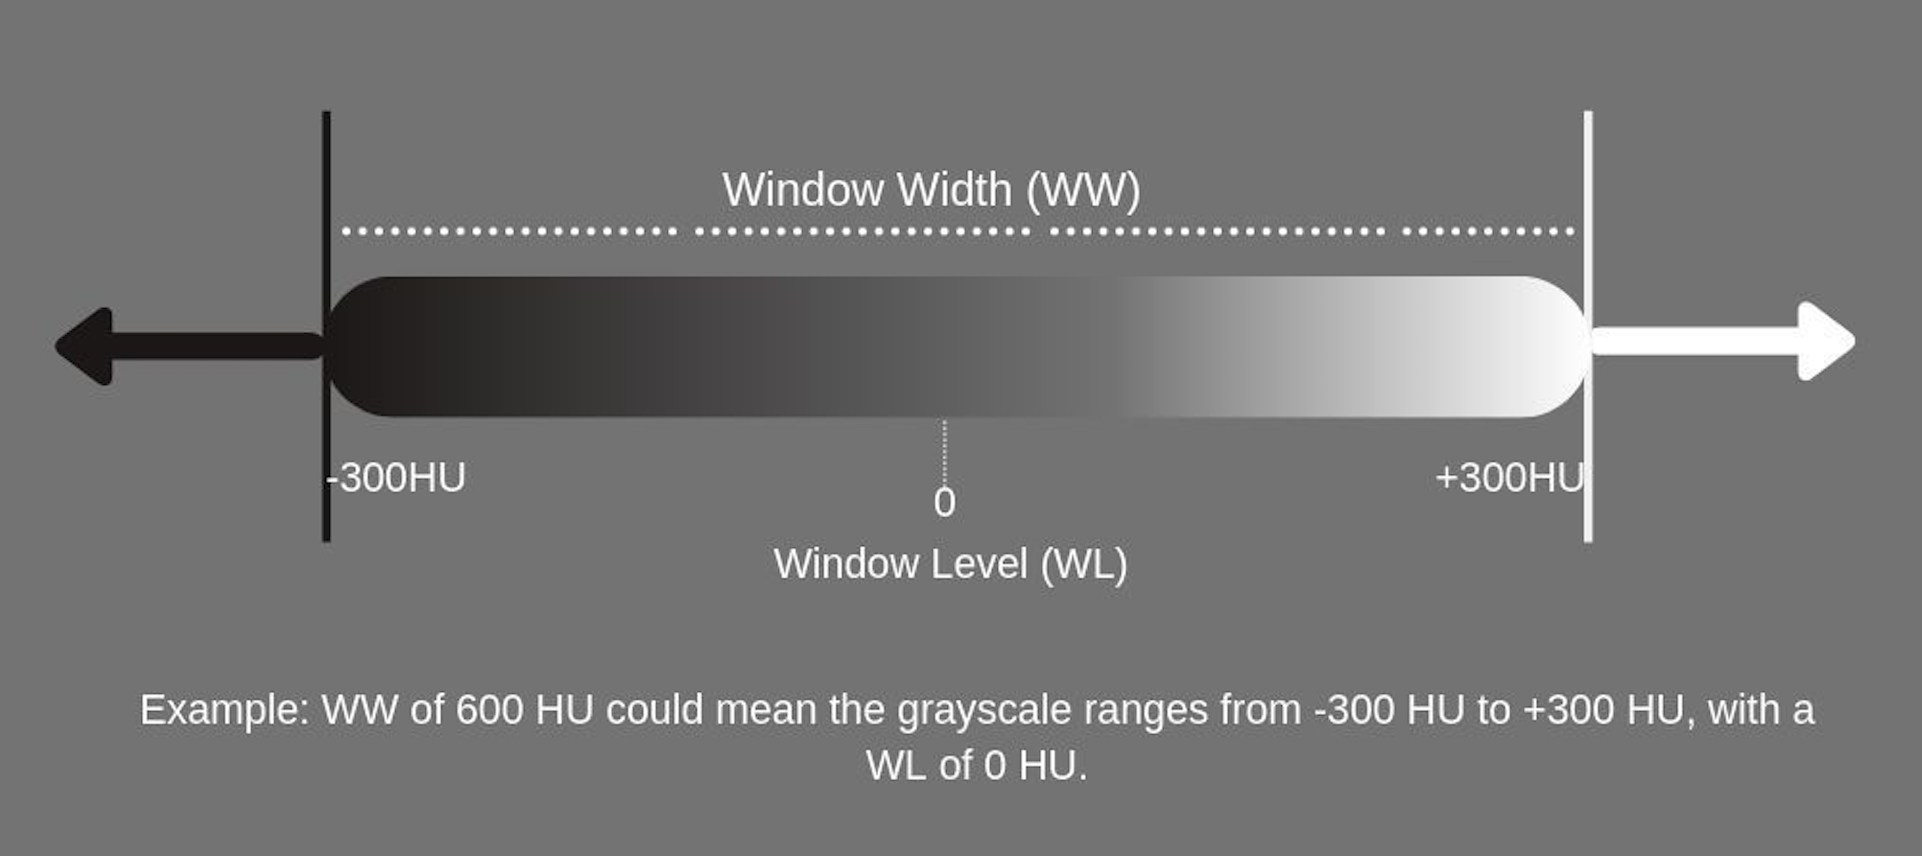
Window Width (WW)
The window Width (WW) as the name suggests is the measure of the range of CT numbers that a CT image contains.
Window width refers to the number of different HU units that will be represented by different shades of gray.
Any HU value that falls below the lower value of the window width will show up as black on the scan while any HU value that is above the upper value of the window width will be white.
Window Level (WL)
The Window Level (WL) refers to the window centre or midpoint HU value that is represented on the window setting.
The lower the window level is set for an image, the brighter the entire image will become.
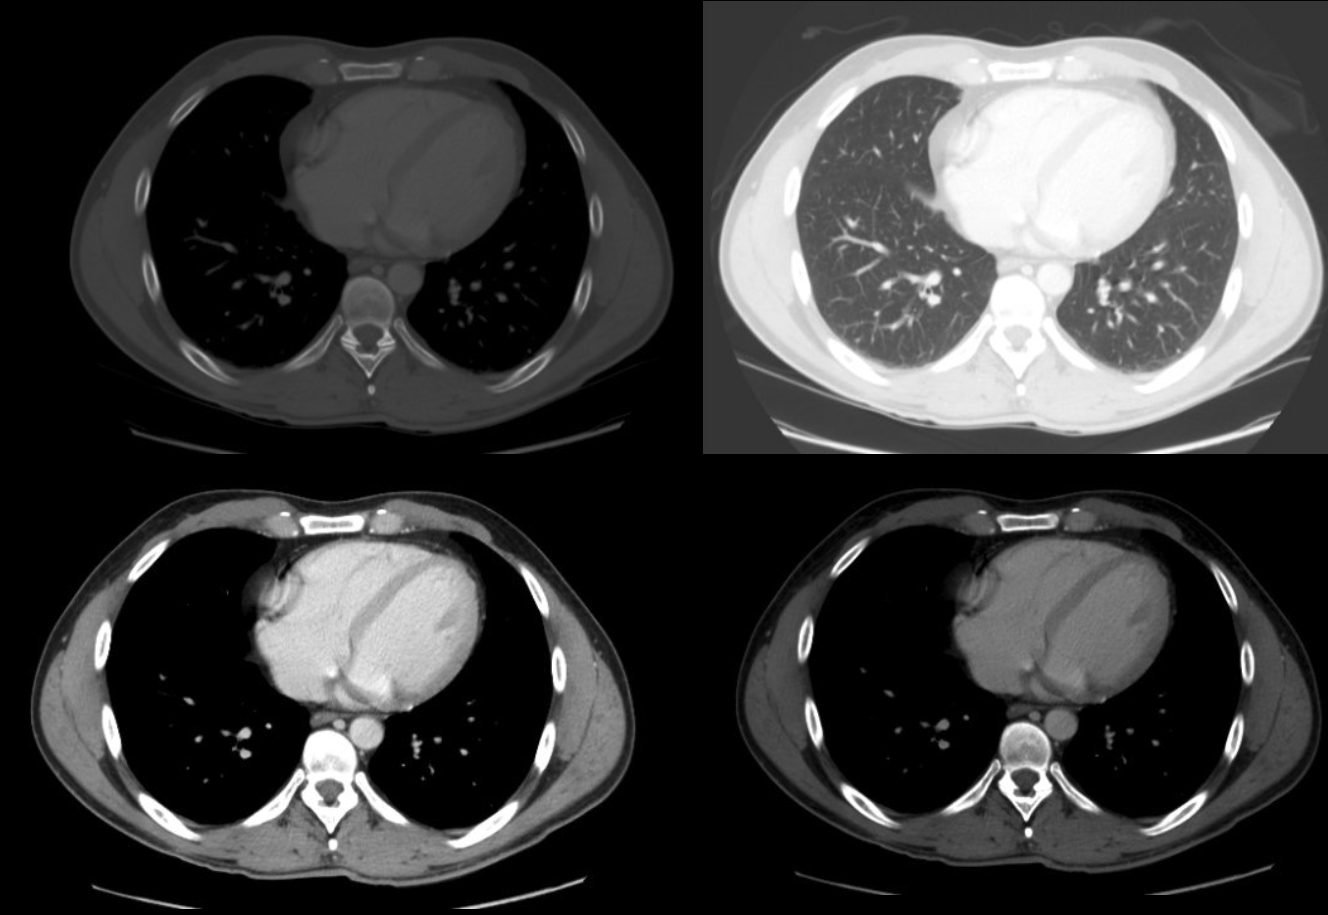
Windowing settings
Understanding the difference between window width and window level is not enough and thus, let’s look at how changing these values can have a significant impact on image interpretation.
Adjusting the Window Width
As the width of the window increases a larger change in density will be required to change the shade of grey that represents a certain HU unit. This results in a loss of contrast as more structures will appear similar (despite having different densities) as there is an increase in the range of CT numbers.
Hence, increasing the window width will decrease the contrast of the image.
Adjusting the Window Width
Now, as the width of the window decreases, a smaller change in density will result in a change in color on the study images. This will give increased contrast as structures that are close in density will have different shades of grey or white or black assigned to them.
Hence, decreasing the window width will increase the contrast of the image.
Adjusting the Window Level
As the window level is increased, the image will get darker. This is because as the level is increased, higher HU values will be required in order for a density to be represented as white and many lower values will be ignored (considered as black).
Hence, increasing the window level will decrease the brightness of the image.
Adjusting the Window Level
Now, as the window level is increased, the image will get darker. This is because as the level is decreased, lower HU values will be required in order for a density to be represented as white, and thus, more white values will be allowed to pass which makes the image brighter.
Hence, decreasing the window level will increase the brightness of the image.
Typical window settings
Below is a list of various window settings that may somewhat vary from institution to institution. However, they are generally fairly similar.
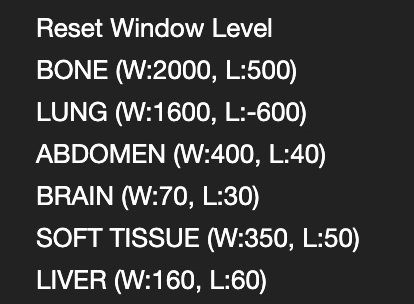
Here, the numbers shown in the figure represent two different values, the first being the window width (WW) and the second being window level (wl).
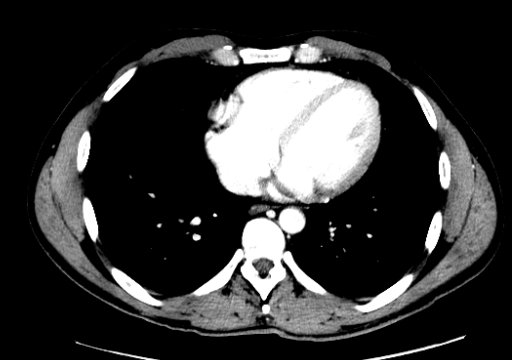
Bone Window
As the name suggests, a bone window is useful for viewing the bones. A high window level near the density of bone (given its density the level is high) is used with a wide window to give a good resolution.
Window settings: (W:2000, L:500) or (W:3000, L:1000)

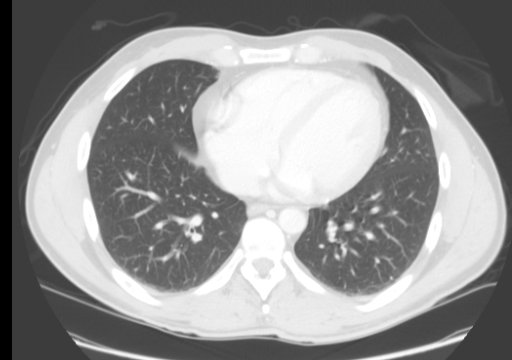
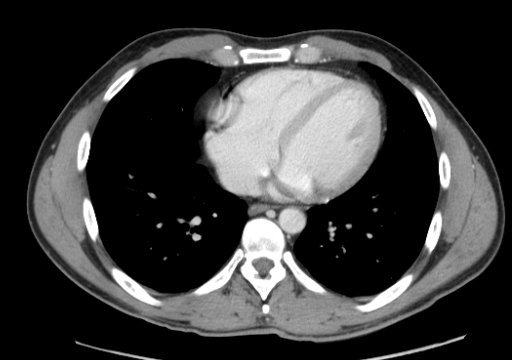
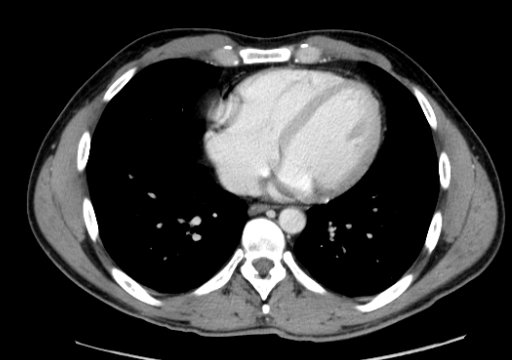
Lung Window
This window is used to evaluate the lungs. A high window level near the density of lung tissue (given its low density the level is low) and is used with a wide window to give good resolution and to visualize a wide variety of densities in the chest such as the lung parenchyma as well as adjacent blood vessels.
Window settings: (W:1600, L:-600) or (W:1500, L:-500)
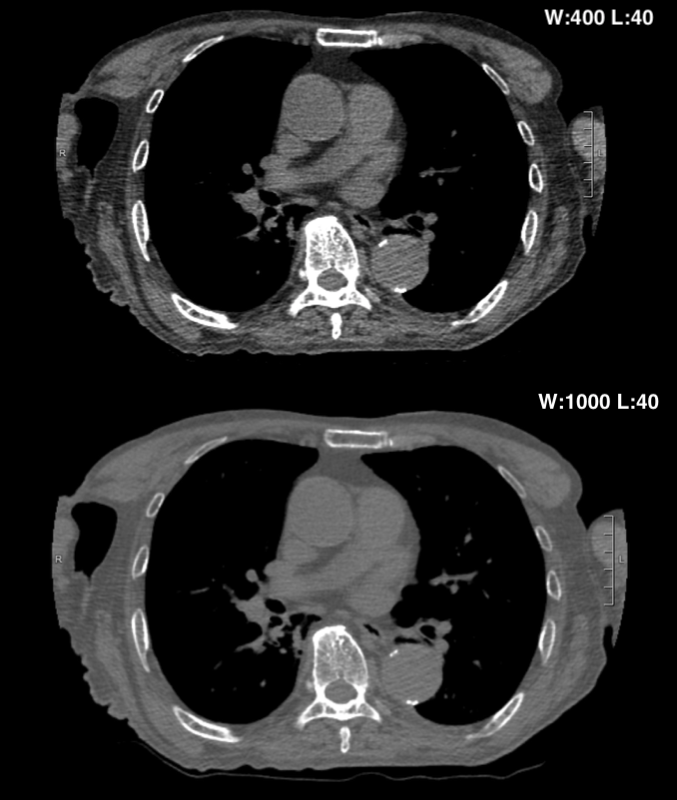
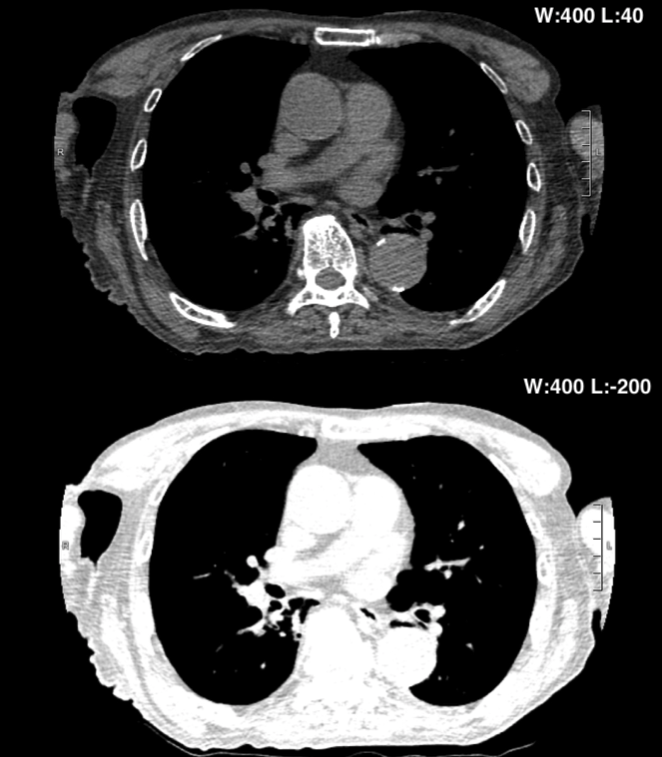
Abdomen Window
The abdomen window is used to evaluate the abdominal cavity and its contents. A window level close to fluid or soft tissue is used with a medium-sized window that gives a moderate amount of contrast.
Window settings: (W:400, L:40)
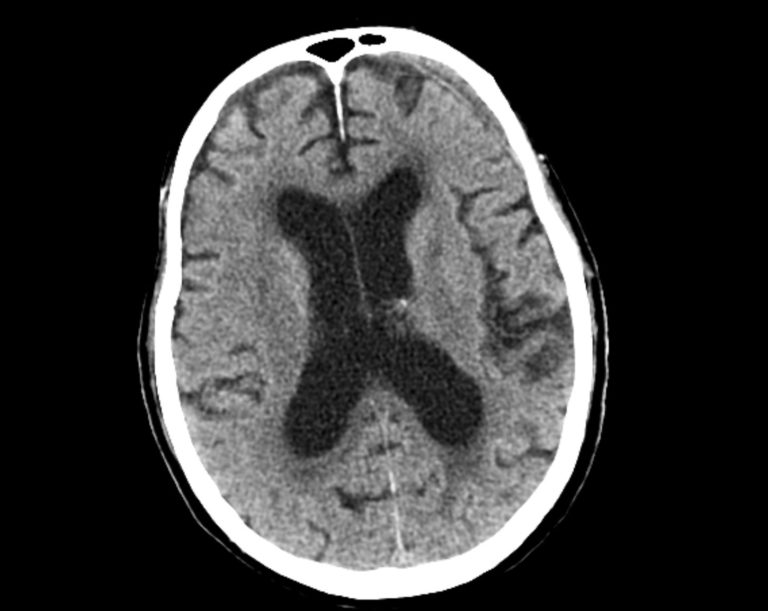
Brain Window
As the name suggests, the brain window is designed to evaluate the brain parenchyma (typically on a non-contrast scan) and is especially sensitive at picking up intracranial hemorrhage with a narrow window and a level close to the density of expected hemorrhage in the brain.
Window settings: (W:70, L:30) or (W:70, L:35)
Soft Tissue Window
As the name suggests, this window is used to evaluate soft tissues. The window level is set at the density of soft tissues (50 HU) and a moderate-sized window is used to give a balance between contrast and resolution.
Window settings: (W:350, L:50)
Liver Window
This window is similar to the abdominal window however utilizes a narrower window to increase the contrast in the liver parenchyma (in order to make finding hepatic lesions a bit easier).
Window settings: (W:160, L:60)